


Okay, it isn't that serious, I still have plain old baking soda! I really did want to make some deodorant and try it out, but this day did not go so well and now I am plain lazy. I was looking around a bit though and found a few other blogs/sites that have their version of the homemade deodorant. I was thinking it would be nice to add some essential oils but unsure if it would change the consistency. I was browsing some blogs and found a link for THIS recipe! Right before I found that one, I found THIS link that shows you an easy way to store your deodorant in an empty "store bought" deodorant container. I believe that link may also have a recipe. Now, I think storing it that way would be sweet, but I haven't bought deodorant in almost a year.I figured it was a good one to share though.
I am really hoping to make some deodorant tomorrow and get a battery charger, so that I can share some pictures of the process :)
Showing posts with label recipes. Show all posts
Showing posts with label recipes. Show all posts
Monday, March 14, 2011
Friday, March 11, 2011
Making Deodorant
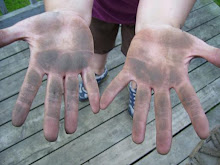
I have not bought deodorant in almost a year and my armpits have never been happier! Now, there are times where I wear nothing at all, but some days it is a necessity to put something under these arms...LOL! On these days, I have simply been putting aluminum free baking powder, under my arms. I simply put the baking soda in my fingers, add a bit of water to make it a paste and wipe it on to my under arms. Though this is very effective, it would be nice to have something already made and quicker to apply.
The other day, this was posted on Facebook, by a lady on my list. It seems so simple to make and I already have all I need to make it. I do have another recipe for homemade deodorant, but this one was right in my face and I figured I would give it a try first. I am really hoping it turns out well and it is something I will make again and again...but if not, there are always other recipes :)
I will be sure to post pictures, as soon as I am finished making this and have tried it out. Wish me luck!!
P.S. This also gives me a use for a little tin I got from some hot chocolate, that was given to me as a gift. It is the perfect size and shape.
Read Along - The Apple Pie Tree

This is our contribution to the read along going on over at Helping Little Hands. A great idea and we are privileged to be added to the many participants :)

We recently got The Apple Pie Tree by Zoe Hall, from the library and Miss Z seems to really love it! I mean, who wouldn't love the story of a tree that produces apple pie?!?! Okay, it doesn't produce pie, but it does produce the most important part of apple pie...APPLES! This is a story of an apple tree as it changes with each season. The end result being growth of fruit, which becomes an apple pie.
What other project would go with this book, better than making an apple pie?
 Reading, reading, reading.
 Making crust.
Whipping up a little appley, delicious filling. We used apples from our freezer, that we picked last summer(local, pesticide free goodness!)
 Filling the mini pies! One for Miss Z and one for her Daddy. (Mommy is watching her weight, but I had a taste)
 Just before they go in to the oven!
 After some serious baking, it is time to enjoy the fruit of our labour ;)
For those who are interested, here is the recipe we used Grandma Ople's Apple Pie. It was more of a base, as we did make a few adjustments...Just the 1/2 cup of brown sugar, less butter and we added cinnamon and nutmeg. YUMMY!
Wednesday, March 2, 2011
Making it Up!

Some of the best meals I have made, were meals that were simply scrounged together with whatever ingredients I had on hand. Today, I made one of those meals! I made a super tasty lunch, using sad looking mushrooms, a dried out onion and some super wilted swiss chard. I just threw it all in a pan, and sauteed it with some sesame oil, fresh garlic, ginger and a wee bit of low-sodium soy sauce. I had some rice vermicelli in the cupboard and it went quite well with my mix and match sauteed veggies!!
This one that I need to write down, so that I may recreate it...NOM NOM NOM!
Wednesday, January 27, 2010
On The Menu: Eggplant Parmesan on Capellini
Yet another vegetarian meal this evening, and it was good!! I think I am in love with the eggplant! They are so tasty and good for you. Mmmmm...Eggplant!
 (I am in serious need of a new camera)
I used a mix of this recipe with this recipe. It's really very easy to make. I just realized, I forgot to shake the Parmesan on top of it...DOH!! Well, I guess it wasn't really eggplant Parmesan, just eggplant mozzarella...LOL!! Ah well, I am on my way back for more and I will be sure to use Parmesan this time ;)
Tuesday, January 5, 2010
On The Menu: Refrigerator Soup + Homemade Crackers

A simple recipe for all to enjoy! All you do is throw everything you have that is "soup" material, in to a pot with water and the spices you like. You might want to add some pantry goods as well, like beans, rice, barley...What ever tickles the taste buds, for you :) I also like to add a soup base/stock for extra flavor.
Tonight, I had a lot of wilted, sad looking produce that I thought would be better eaten in a soup, than wasted. I love getting to use everything, and wasting nothing!! This also good to make when you find yourself in a grocery crunch (I haven't been to the grocery store, and we are past due for a visit..LOL) Here is what I put in my soup:
Celery
Zucchini
Carrots
Onions
Garlic
Tomatoes (frozen, from our garden)
Cabbage
Onion soup mix
Barley
And, I think that's it!
Of course, what is soup without cracker? Just silly! So, I whipped up some homemade cracker as well :) These are so very simple to make and you can make which ever flavor you like. I made plain whole wheat and cheese...Mmmmm! I Googled cracker recipes and found a large amount of different kind types of crackers. I just grabbed something from each one and threw this together:
Homemade Crackers

1 cup unbleached flour
1 cup organic stone ground whole wheat flour
1 tsp baking powder
1/2 tsp salt
2/3 cup water
1/3 cup olive oil
1/2 - 1 cup cheese (not really sure here - Of course, you can make whatever flavor you like)
Combine flour, baking powder and salt. I just gave it a quick mix up. Then add the liquids. I mixed it all together with my hand until it formed a nice ball. I suppose I kneaded it a little, but nothing too heavy. Roll out on to a floured surface, make it really thin. Cut in to what ever shape or size you want. I used a pizza cutter and cut them in to squares. Bake for about 10-15 minutes on a greased cookie sheet. Let them cool for a few minutes...VOILA!
Hope that makes sense :)
Monday, December 21, 2009
On the Menu: Eggplant Pasta Bake
Lately, I have been trying a lot of new dishes for our meals and I thought it would be fun to start a little segment called, "On the Menu", to share with you the tasty recipes we've been trying.
I have been in search of some great vegetarian meals, in a fight to eat healthier and be greener. In my searches, I have found a lovely selection of tasty meals and am amazed when everyone actually likes the them! Macho Man is not in to veggies at all, so when he likes it, it is far more amazing than when Ya-ya eats it all up.
I must add that this dish was absolutely delicious and it was gobbled right up! I think it may be a new favorite, along with the vegetarian Minestrone Soup from last week.
Without further adieu, here is tonight's tasty meal:
Eggplant Pasta Bake
 (this is my finished product...It was soooooooo YUMMY!)
Deliciously rich and full of tomato goodness. Whole wheat pasta adds a nutty flavor to this casserole.
2 cups Whole wheat penne pasta (or other tube pasta)
2 Medium eggplants, peeled and cut lengthwise into 1/4 inch (6 mm) slices
Salt, sprinkle
1 tbsp. Olive (or cooking) oil
1 cup Chopped onion
2 3/4 cups Tomato pasta sauce
6 Roma (plum) tomatoes, chopped
1/4 cup Basil pesto
1/2 cup Grated Parmesan cheese
1/2 cup Grated part-skim mozzarella cheese
Cook pasta in boiling salted water in large uncovered saucepan or Dutch oven for 8 to 10 minutes, stirring occasionally, until tender but firm. Drain. Return to same saucepan. Set aside.
Sprinkle both sides of eggplant slices with salt. Place on wire rack set on baking sheet with sides. Let stand for 20 minutes. Rinse with cold water. Blot dry with paper towels. Spray both sides of eggplant slices with cooking spray. Preheat gas barbecue to medium (see Note). Cook eggplant on greased grill for 2 to 3 minutes per side until golden. Transfer to large plate. Cut into 1 inch (2.5 cm) pieces. Add to pasta.
Heat olive oil in small frying pan on medium. Add onion. Cook for 5 to 10 minutes, stirring often, until softened. Add to pasta. Stir.
Add next 3 ingredients. Stir. Transfer to greased 3 quart (3 L) casserole.
Sprinkle with both cheeses. Bake, uncovered, in 350°F (175°C) oven for 30 to 40 minutes until heated through and cheese is golden. Serves 6. 1 serving: 447 Calories; 16.6 g Total Fat (8.3 g Mono, 2.6 g Poly, 4.5 g Sat); 13 mg Cholesterol; 64 g Carbohydrate; 7 g Fiber; 17 g Protein; 828 mg Sodium. Note: If preferred, cook eggplant slices in 3 batches in 1 tbsp. (15 mL) olive (or cooking) oil in large frying pan on medium for 2 minutes per side until golden.
Tonight's dish has been brought to you by Company's Coming Most Loved Casseroles Cookbook
Wednesday, October 14, 2009
Strawberry Short Cake for Lottie!!
Just for you sweet Lottie!!
Baking Powder Biscuits
Ingredients:
1/4 cup shortening
2 cups all-purpose flour or whole wheat flour
1 Tbsp sugar, if desired
3 tsp baking powder
1 tsp salt
3/4 cup milk (soy, rice, cow, whatever)
Instructions:
Heat oven to 450 degrees.
Cut shortening into flour, sugar, baking powder and salt with pastry blender until mixture resembles fine crumbs. Stir in just enough milk so dough leave side of bowl and rounds up into a ball. (Too much milk makes dough sticky; not enough makes biscuits dry.)
Turn dough onto lightly floured surface. Knead lightly 20 to 25 times, about 30 seconds. Roll or pat 1/2" thick. Cut with floured 2 1/2" biscuit cutter. Place on ungreased cookie sheet about 1" apart for crusty sides, touching for soft sides. Bake 10-12 minutes or until golden brown. Immediately remove from cookie sheet.
* If using self-rising flour, omit baking powder and salt.
I found the recipe here.
Strawberries and Whip Cream
All I did was wash and sliced the strawberries.
I made my own whipped cream, using a carton of whipping cream. It comes in a carton at the grocery store. You simply mix it with a hand mixer.
When whipping the cream, I add a few scoops of icing sugar and a cap full (from the bottle) of vanilla extract. I use a hand mixer and blend on high until it reaches the desired texture (whipped cream texture of course).
Cut biscuit in half. Put a piece of the biscuit in the bottom of your dish and top with whipped cream, then add some strawberry. Put top of biscuit on top of everything, add more topping and a strawberry to garnish. I also scattered some strawberries around the biscuit in the bottom of the dish. This is really up to you, however you want to put it together.
Friday, September 11, 2009
The Long Awaited Playdough Post!
Ladies and gentlemen! I give you, the post you have all been waiting for...HOMEMADE PLAYDOUGH!! It turned out great, just as I remembered it as a child. The best part was kneading it while it was still warm, my favorite part of homemade cooked playdough!

Here we have a picture of the playdough before and after coloring. Next, is a picture of Tinker enjoying her new treats!! She had a great time playing with it and didn't make much of a mess (to my surprise). We both had a good time with the playdough and when Daddy got home from work, so did he...LOL!! See, great fun for all ages :)

I looked at all kinds of recipes and tutorial videos on You Tube, but I am not sure where the recipe I used came from. They're basically all the same idea and you can add or take away whatever you want, to suit your playdough needs :)
Here is the recipe that I used:
1 cup flour
1 cup water
1/2 cup salt
1 tbsp oil
2 tbsp cream of tartar (I believe this is just a preservative and from what I hear, you don't have to add it. I think it just might not last as long)
food coloring
I just mixed all the ingredients in a medium pot and then cooked it over a medium to low heat. Keep stirring until the mixture becomes lumpy and form a sort of ball. I then let it cool until it was cool enough for me to handle. Put dough on a floured surface and knead until smooth and no longer sticky. Add food coloring as desired and VOILA! Be sure to store in air tight containers or baggies, to keep fresh...ENJOY!!
This recipe makes a pretty nice amount of playdough. When I started to make it, I thought it was such a small amount, but it is actually quite a bit. I hope you all enjoyed this post and make lots of your own homemade playdough. If you do, be sure to post pics so I can see the playdough goodness :)
Subscribe to:
Posts (Atom)